
I’ve done the Otter Trail more than twenty times and I’ll do it again and again and again. There is only one word to describe it: paradise. I recommend it to everybody. The Otter Trail should be number one on everybody’s bucket list. This guide should give you an insight into all aspects of this trail.
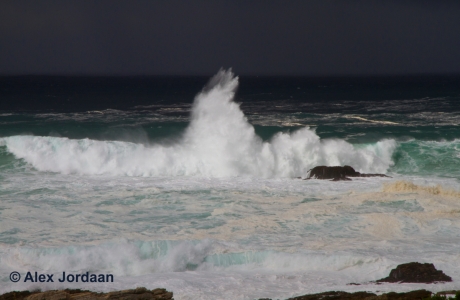
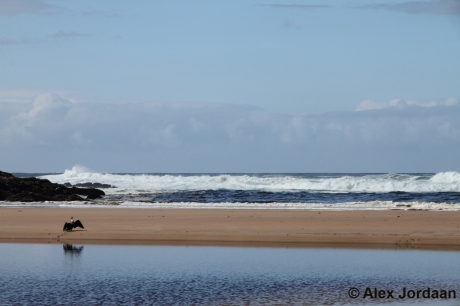
Crashing wave
Preparation: Preparation should be taken seriously. Here is a whole list of things to take into account once you have decided to do the otter trail:
- Make sure you book well in advance. The Otter Trail is very popular, for good reason. If you want to go on a specific date you will have to book at least 9 months in advance. If you are not too fussed about a specific date I would say to still book about 6 months in advance. If you have less time left till the time of year you want to do it you might be lucky and get a cancellation. See the “contacts” section for booking contacts
- When should you go? It all depends on you and what you want to get from the experience. I prefer going in summer. When it is hot you can swim to cool down and river crossings will not leave you with hypothermia. Also see the “climate” section.
- Tide: One reason to take the tide into consideration is because the river crossings can be tricky if the tide is not low enough. I would recommend planning your booking to get day four on spring tide, or as close as possible to it. This is of course only relevant if you want to cross the Bloukrans river without getting soaked. This would also be the safest time to cross. The only drawback is that you would have to get up very early that morning in order to get to the Stormsriver at low tide. Spring low tide is always in the morning.
- Who do you take? I would recommend taking your partner; it’s really awesome to share this experience with a loved one. Close friends are a good idea. You want to be able to get on with the people you go with. There is nothing worse than having disagreements with your fellow hikers. And make sure that everybody has got a reasonable level of fitness. This trail can be tough. Also keep in mind that each overnight spot have two huts that can sleep six people each.
- Once you have made a reservation and you have organised people to go with you; can you sit and wait until the start date arrives? No! You make sure you are as fit as possible. Most people that have done the Otter Trail would say you do not have to be very fit to do it. I do not agree completely. Yes you can do it without being very fit. The thing is, the fitter you are the more you can enjoy the trail, the nature, the scenery, your chill time after each days hiking and your holiday. If you decide to train make sure you focus on endurance and strength. Climb mountains, do long hikes, get your general fitness to a level where you can easily hike on mountainous terrain for three to four hours. And make sure you get used to your backpack. Maybe do a multi-day hike in preparation.
Once the start date is getting close: Make sure everybody that said they are coming is actually coming. Have a meeting to discuss your menus. It’s nice to cook together in the evenings. Work out menus. For six people you only have to take one stove and cooking set. Two gas canisters should be sufficient, but take a third just to be sure. One big pot and one smaller one should also do. You can share things like sun cream, toothpaste, survival bags, etc. Plan to take the minimum possible. Decide who will take what and make sure weight will be evenly distributed. Make sure everybody has got a good hiking pack. Get these logistics out of the way. Also see the “food” section and the “what to take” tick list.
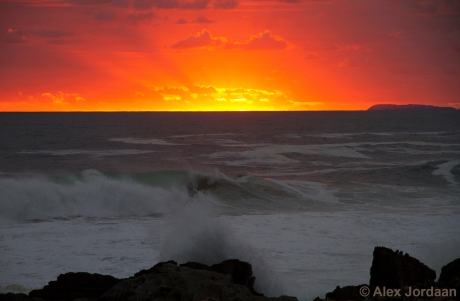
Spectacular sunset
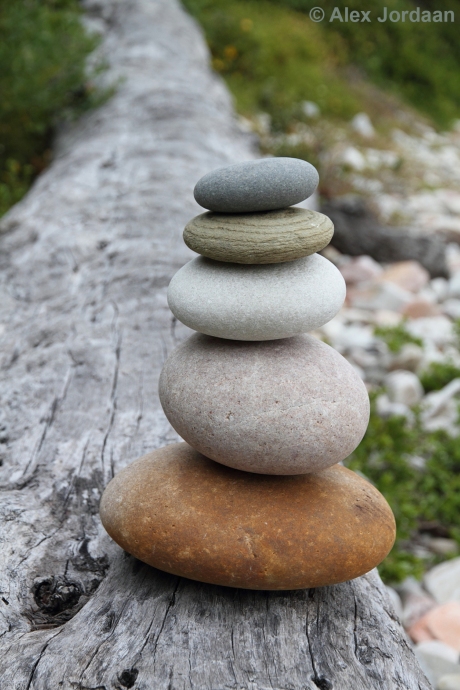
Balancing act
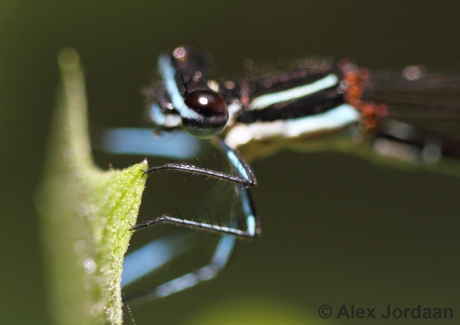
Dragonfly eye
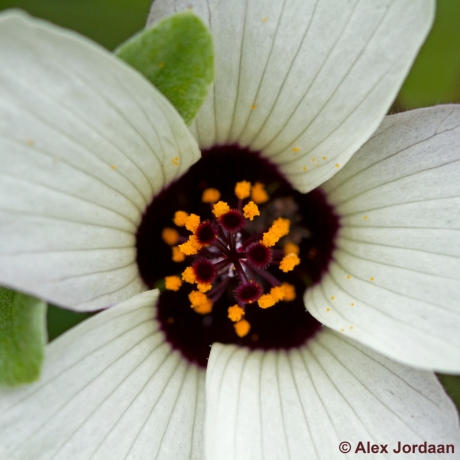
Flower
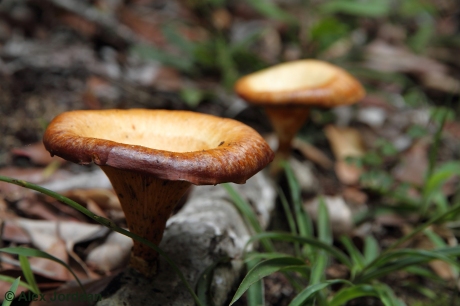
Mushrooms
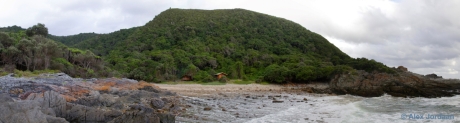
Overnight camps: Each overnight camp consists of two huts sleeping six people each and a communal lapa. Each hut and the lapa have a designated fire place with braai/BBQ grids. There is a flush toilet and a cold water shower at each camp and taps with running water. These camps are set on the shoreline and the views are amazing.
What to take:
- Backpack. A decent hiking pack. One with its own built in rain cover is the best.
- Sleeping bag. Mattresses are supplied in each overnight hut.
- Blow up pillow. This is necessary if you like sleeping with a pillow and want a good night’s rest.
- Survival bag. This is available at any outdoor shop. It is a big red plastic bag to put your backpack in when crossing rivers.
- A drybag for your valuables when you cross rivers.
- A piece of rope to close the survival bag with when crossing rivers.
- A cooking set. One big pot and one medium size pot should be sufficient for six people.
- A gas stove and three gas canisters should be enough for six people.
- A mug. Plastic weighs less than metal.
- A plate and cutlery. Once again plastic weighs less but take metal cutlery.
- A sharp knife for preparing food.
- A light cutting board.
- A pocket knife can double up as a food preparation knife.
- Washing up liquid and a washing up sponge.
- A headlamp. There is no electricity nor lights at the overnight camps.
- A book if you want to read or a pen and paper for writing.
- Matches or a lighter for starting your campfire at night. Make sure to keep these dry.
- A camera.
- Sunglasses.
- A water bottle. Water bladders also work well. No more than two litres is needed, there is water along the way and there are taps at the overnight camps.
- Two fully charged cell phones per group. Make sure to save the emergency numbers given to you by SAN Parks at the start. And keep the phones off to save the batteries. There is very little reception anyway.
- Map. You will receive a map at the start of the trail.
- Tide table. This you will also receive at the start of the trail.
- Duct tape and some cable ties are always a good idea. You can fix broken shoes, etc. with it.
- Extra zip lock bags can also come in handy.
Clothes:
- A rain jacket.
- A hat for sun protection.
- A good pair of hiking shoes/boots. Boots are normally heavy. Hiking shoes should be fine. The terrain is even enough.
- I prefer a pair of socks for each day. It does not weigh much and it saves you washing your socks each day and hoping they will be dry the next day.
- Underwear for each day.
- A pair of flip-flops or comfortable shoes for the camp.
- A warm jacket. Even in summer it can get cold at night.
- Two changes of clothes. One set of clothes to hike in. I like running shorts and a quick-dry T-shirt. A different set of clothes for the evenings. A pair of long trousers/sweat-pants, a T-shirt and a long sleeve top.
- In winter be sure to take enough warm clothes.
- A towel. The camping towels fold up small and dry quickly.
Toiletries:
- Toothbrush and toothpaste.
- Biodegradable soap. There is a cold water shower at each overnight camp.
- Sun-screen. Take a high factor; you will be in the sun a lot.
- Insect repellent.
- Any personal medication.
- Things like shampoo, lotions, creams, deodorant, etc. are optional. I would recommend not taking any of these. Everybody will be smelly by the end of the trail anyway. Remember the lighter your pack the better.
- Toilet paper. One roll per person should be more than enough. I would even say one roll between two people is sufficient.
- Nail clippers. They come in handy to cut toenails, etc.
Medic kit: One medic kit per group. Your medic kit should at least contain the following items:
- Headache tablets/pain killers.
- Plasters.
- Diarrhoea tablets.
- Anti-septic. Betadine or similar.
- Eye drops.
- Antihistamine tablets.
- Dettol.
- Itchy cream. Zambuk works and can double up as a lip balm.
Food: For evenings things like pasta and sauce or tuna and rice are good. You need a lot of carbs. It is advisable to take some meat to braai for the first night. For breakfast take muesli or instant cerial. Take snacks for lunch time and to nibble on in between. It is also a good idea to take some fresh fruit or vegetables, just to eat something fresh every day. You will be surprised how nice something fresh to eat is after a hard day of hiking. Make sure your fruit does not get squashed. Also take into account that the trail is five days, but for the first day (if you start after lunch) you will only need dinner and a snack. And for the last day you will only need breakfast and a snack. There is a restaurant in Natures Valley at the end of the trail. They are open seven days a week and make the best burgers. For what to pack see my list below as a guideline:
Breakfast:
- Muesli or instant cereal for each morning.
- Instant coffee.
Lunch:
- Biscuits. Saltycracks or Pro-vita are good.
- Cheese wedges. Melrose is good and will not go off.
- Biltong or salami is good for protein.
- Canned tuna is also good.
Snacks:
- Nuts.
- Dried fruit.
- Energy bars.
- Fresh fruit or vegetables.
- Sweets for energy.
- Biltong or salami.
- Biscuits.
- Energy drink powder.
- Anything high in nutrition is good
Dinner:
- Meat for the first night.
- Fresh salad is also nice for the first night.
- Pasta with some instant sauce.
- Rice with tuna or some instant sauce.
- Dehydrated food like Smash is good. Add some salami or instant sauce.
- Tea and sugar.
- Chocolate is great after dinner.
- Anything light and high in nutrition is good.
- Take some garlic, onion and chillie to spice your food up.
Transfer: You can either take two vehicles and then leave one at the trail end and take the second one to the start. This means that you will have to go back to the start to fetch your vehicle when you finish. The other option is to get a transfer to the start. This way your vehicle will be at the end when you finish. See the “contacts” section.
The trail: The otter trail is a five day hike with the following distances and durations:
- Day one = 4.8km (2 hours)
- Day two = 7.9km (4 hours)
- Day three = 7.7km (4 hours)
- Day four = 13.8km (6 hours)
- Day one = 6.8km (3 hours)
Day one: The Otter Trail starts at the Storms River. Day one takes you to the Ngubu Huts. But before you start you have to report at the park office to get your permits, maps, tide table and to pay your conservation fee. It will save you from carrying lunch if you start hiking in the afternoon. Unless you want to spend as much time as possible in nature and don’t mind carrying lunch. About halfway to the huts there is a very nice waterfall with a pool to swim in. The water is cold though. The first day is very mild and is a nice introduction to what the trail has got to offer. It consists of some walking in a forest, on a rocky shore and some stairs in between. Stop as often as you can to explore. The fauna and flora in the area are amazing, not to mention the other scenery. Keep a look out for Knysna Loerie.
Once at the Ngubu huts you can relax. I like to explore around the huts, it gives me a better chance of seeing wildlife. The last time I did the Otter Trail we saw an octopus in the puddles close to the camp. At night watch out for Cape genets, they are very tame and will steal your food from the hut if you leave the door open.
For the first evening a braai/BBQ is a good idea. Take something to drink. Once this weight is gone your bag will be lighter.
Falling asleep with the sound of the waves crashing on the shore makes for a great rest. You have now finished the first day and the trail life begins.
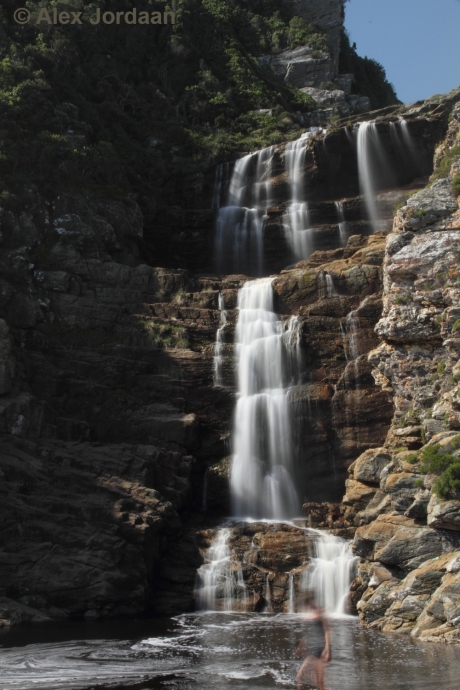
Waterfall on day 1
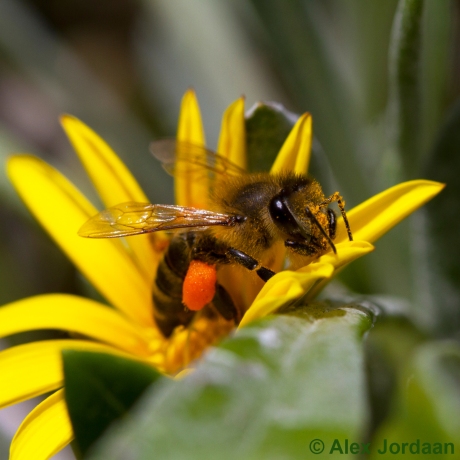
Busy bee
Day Two: Day two takes you to the Scott huts. Getting up early will not only better your chances of seeing an otter, but it will give you more daylight time to enjoy the scenery. It is also nice to start hiking early in the morning when everything is fresh. This is the day you will get a wakeup call if your bag is too heavy. At the two kilometre mark you can leave your bags on the main path and take a quick detour to Skilderkrans, a quartzite outcrop with great views.
About another two kilometres further and you can take another detour to Bloubaai, a picturesque bay with a white sandy beach. This is a nice lunch spot.
The first river crossing is on day two, but no need to get wet or even take your shoes off. Just go a bit up river and hop from rock to rock.
In the sea in front of the Scott huts is a big rock that makes for a great show when waves crash into it.

Long exposure of a wave crashing into a rock
Scott huts
Day Three: About an hour’s walk from the Scott huts you will find the Elansbos River. This is a nice spot to spend some time and have a swim. Make sure to get to the Lottering River close to low tide to make for a dry crossing. This river is very close to the Oakhurst huts.
Elandbos river mouth
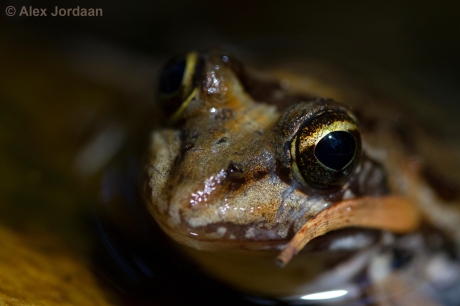
Golden eye
Day Four: This day is the longest hike of the five days and will take you to the Andre huts. At the 10km mark you will cross the Bloukrans River so allow enough time to get there at low tide. If it is spring tide you will have to get up very early and start walking in the dark. I have only done this river crossing at spring low tide and I never had to wade in more than waist deep water. Remember to put your backpack in your survival bag for the crossing and make sure to tie it up very well otherwise your bag might get wet. I cannot stress this enough: if the conditions are not favourable to cross the Bloukrans River; inform the park rangers. They will pick you up and you can then enter the trail again close to the Andre huts.
The Andre hut camp is my favourite of the trail. Right in front of the camp is a nice place to swim when the tide is low and the setting of this camp is spectacular. There is a family of bushbuck that are very tame. Enjoy your last night because the following day it’ll be back to reality.
Bloukrans river mouth at low tide

Andre Huts
Day Five: The last day is a breeze compared to day four. The hike starts with one big uphill and thereafter it is easy going. Stop at the lookout decks and take in your last day on the trail. At Nature’s Valley a spectacular view awaits you. A swim in the sea here is really great. The last stretch is on the beach. By this time you will be filled with joy and a sense of accomplishment. Have a nice hot shower at the Nature’s Valley camp where you left your vehicle. Remember to leave a clean set of clothes in the vehicle to put on after your shower. The clothes you’ve been wearing for the last five days will be filthy.
It is always a bit of a shock to get back to civilization but the feeling of accomplishment and life being simple will linger for a while. Keep the memories fresh: remember to take lots of photographs. I’m sure you’ll be back.
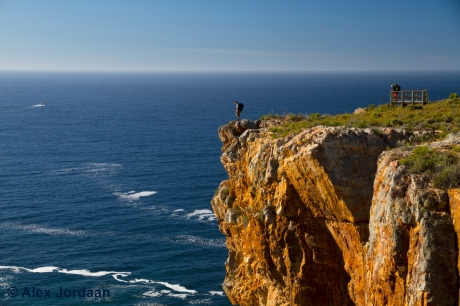
Lookout point on day 5
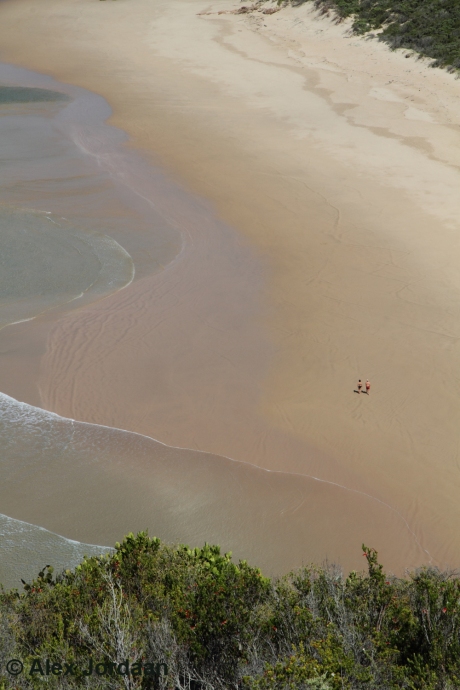
Nature’s Valley view
Contacts:
- SAN Parks Otter Trail booking office: http://www.sanparks.org/parks/garden_route/camps/storms_river/tourism/otter.php
- Transfer: Phone Vernon at 072 658 9858 for the best price and acceptation service
Climate:
Links to other articles:
Happy hiking!
For more on packing: Packing light for the Otter Trail

Want to do this trail so bad but don’t know when is the best time to go? When will day fall on the a spring low tide? How do I work it out? End of this year or early 2018
Hi Elmarie,
Any time is good. Choose the weather you would like to walk in. Summer can get hot but you don’t need to take lots of clothes. Winter is cold and nice to hike in but you need to carry enough warm cloths. Check the tide tables for the area to see when it’s spring tide. There is a spring tide every two weeks during full moon and new moon.
Happy hiking!!
Great guide.. i will be attempting the trail for the first time if i can get avails this year.
Hi. I have just completed my 5th Otter. Found the month of April to be the best. Found fisherman along the trail. The huts are fitted with trellor doors. Rivers are very low. Water points are not easy to come by.
[…] there on what to pack for the hike and I found these two posts quite useful: Otter Trail 101 and The Definitive Otter Trail Guide. I learnt quite a lot along the way and thought I’d share my top eight picks on what to pack […]
Thanks for the useful info.
Just wondering if there is wood supplied at the overnight huts?
Hi Ron,
Thanks for your post.
There are wood supplied at the huts.
Happy hiking!!
Hi. We are doing the otter hike on the 25th of July 2018. How will the weather be for this? I hope it’s not raining every day
Hi Ryan,
I have done the Otter in July once and in August twice, the weather was never extremely bad, but you will seldom do the trail without some rain. Take your rain jacket and some warm clothes, it can get cold at night. The trail gets slippery after rain but it’s beautiful when the streams are all flowing. If the Bloukraans is in flood take the escape route.
Have a fun Otter!!